Building a pantry of preserved foods is a cornerstone of self-sustainability and food security in uncertain times. By canning, dehydrating, and fermenting, even novice preppers and urban homesteaders can turn seasonal produce into long-lasting supplies. Imagine enjoying your own summer tomato salsa or sauerkraut in the dead of winter – it’s both a lifestyle reward and a key aspect of food preparedness.
If you lack a farm, local resources like farmers’ markets or community-supported agriculture (CSA) programs offer fresh produce to preserve. CSA programs, for example, connect you with farmers through prepaid seasonal shares, delivering fresh vegetables and fruits that help build local food resilience.
This guide covers the basics of each method, starter recipes, and crucial safety tips so you can confidently stock your pantry while embracing modern homesteading and off-grid living principles.
1. Canning Basics
Canning preserves food by heating jars to kill bacteria and create a vacuum seal. This process is “important, [and] safe if practiced properly”. There are two main methods: water-bath canning (for high-acid foods) and pressure canning (for low-acid foods).
Acidity is critical: bacteria like Clostridium botulinum cannot grow below pH 4.6, so acidic foods (fruits, most pickles, tomatoes with added lemon/vinegar) can be safely water-bath canned. In contrast, vegetables, meats, and seafood are low-acid and must be pressure-canned to reach temperatures above boiling that destroy spores.
The USDA and nutrition experts stress using only up-to-date, tested recipes. For example, the Academy of Nutrition recommends using a pressure canner for low-acid foods, and adding lemon juice to tomatoes (some varieties are borderline low-acid).
Always follow USDA or extension guidelines (e.g. the USDA Complete Guide to Home Canning) and correct processing times/pressures to prevent botulism.

2. Dehydrating Basics
Dehydrating (drying) removes moisture so microorganisms can’t grow. It is “one of the oldest methods of preserving food” and “simple, safe and easy to learn”. A good dehydrator or low oven can dry many fruits, vegetables, even meats. The benefits are clear: dried foods are lightweight, compact, and need no refrigeration, making them perfect for camping, bug-out kits, or storage.
In fact, land-grant extension notes that drying uses far less energy than canning/freezing, and the compact dried fruits are high-energy snacks for hiking or emergencies..
Key Home Dehydrating Safety Tips:
-
Wash and inspect all produce; remove any blemished parts to prevent spoilage.
-
Dry foods thoroughly. Under-dried food can spoil; test pieces by cooling then squeezing to ensure no moisture pockets.
-
Condition dried batches by loosely packing them in jars for a week to equalize moisture. If condensation appears, dehydrate longer.
-
Package dried foods in airtight, moisture-proof containers (vacuum seal or Mylar bag with oxygen absorber if possible) and store them cool (some even freeze-dry or freeze-dry where available). Properly dried and sealed fruits/vegetables last many months without refrigeration.
In hot, dry climates you can also sun-dry some foods. NCHFP notes that high-sugar fruits (like grapes for raisins) can be dried outdoors when it’s 85–100°F with low humidity. However, sun drying is not recommended for low-sugar foods or in humid areas, and requires covering fruits at night to avoid moisture. For beginners, an electric dehydrator is easiest, and Seed Armory’s food preservation tools include simple dehydrator shelves and oven racks.
3. Fermenting Basics
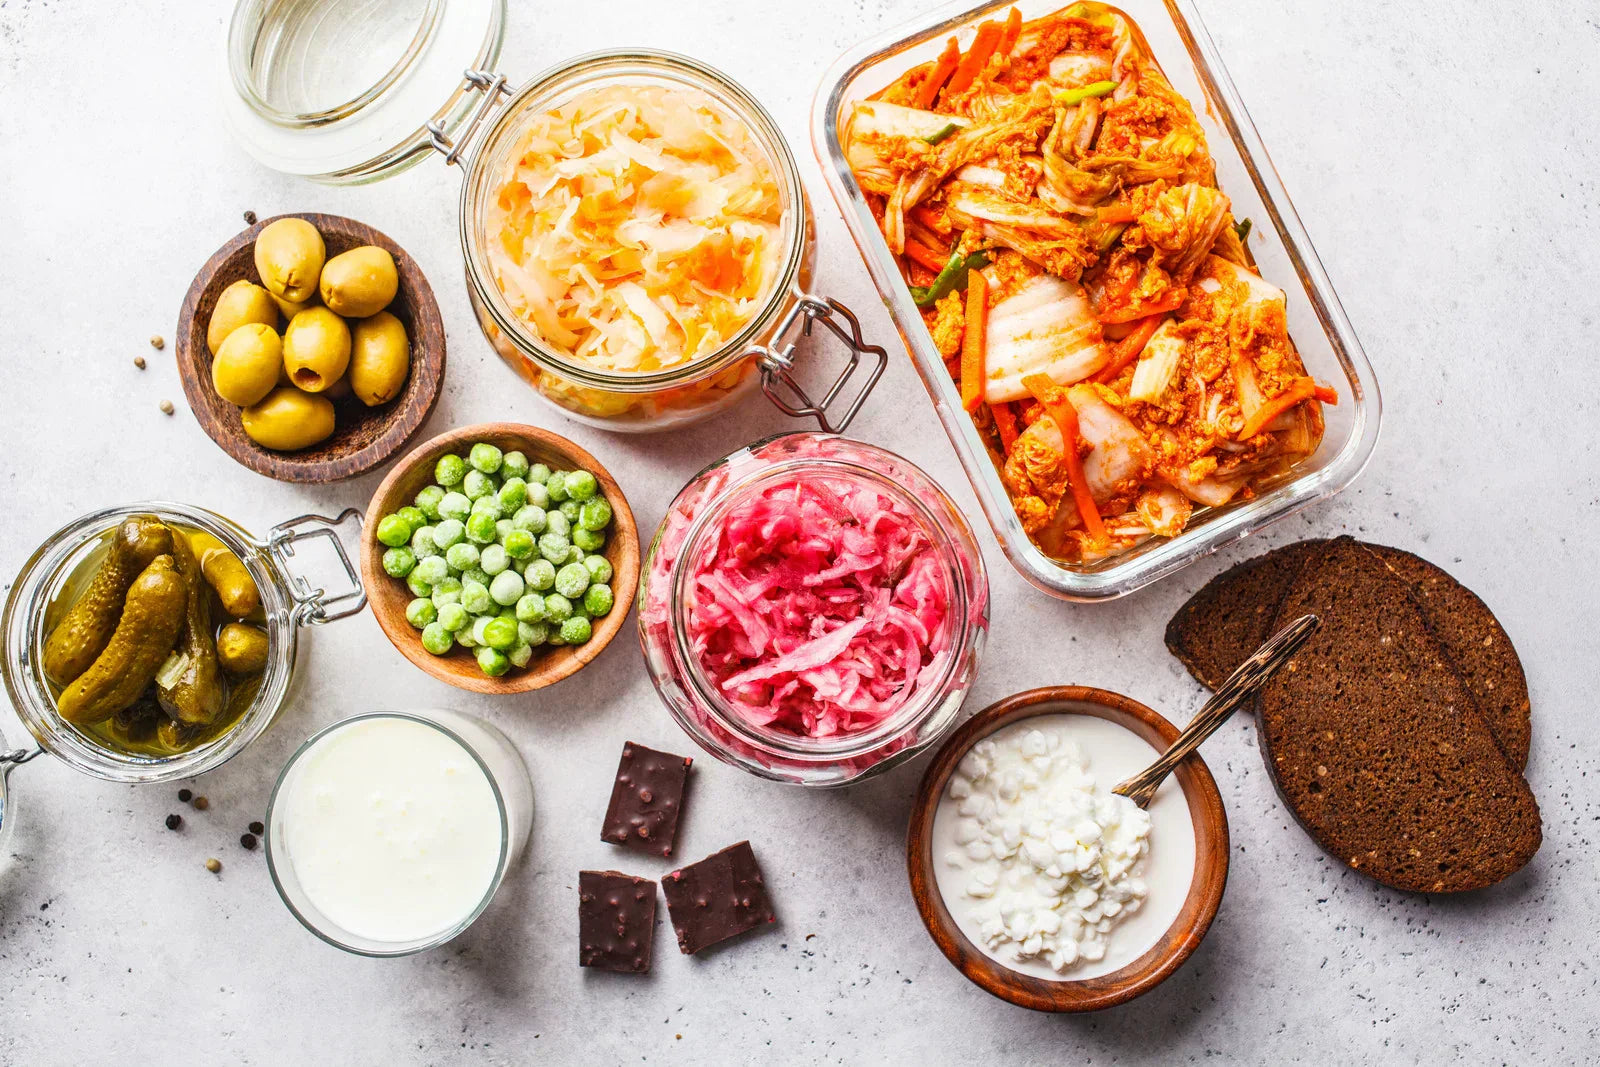
Fermentation harnesses beneficial microbes (primarily lactic acid bacteria) to transform foods, preserving them with acid and creating probiotics. Classic fermented foods include sauerkraut, pickles, kimchi, yogurt, kefir and kombucha. A basic vegetable ferment (like sauerkraut) requires only fresh produce, salt, and time.
For example, sauerkraut: shred cabbage and mix with ~2% by weight salt. Massage until juices release and pack tightly in a jar or crock, keeping the cabbage submerged under its brine. Cover loosely (airlock lid or cloth). Store at room temperature (~65–75°F) for 1–4 weeks. You’ll see bubbles as fermentation proceeds; the sauerkraut is ready when it tastes tangy. Then seal jars and refrigerate, where it can keep for many months.
Ferments also tie into self-reliance: imagine tasting your own homemade kimchi with dinner, knowing it’s packed with nutrients and friendly bacteria. Fermented pickles and krauts are traditional urban prepping foods because jars don’t need electricity, just room temperature.

3 Simple Recipes to Start Your Canning Journey Off Right

Easy Water Bath Canned Pickles
20 minutes
15 minutes (plus 10 minutes canning)
~4 pint jars
Food Preservation / Pickles
Why it’s good for health:
Homemade pickles avoid the preservatives and artificial additives found in store-bought versions. Plus, vinegar-based pickles are low in calories, and cucumbers provide hydration and fiber. Adding garlic and dill boosts the immune system thanks to their natural antibacterial and anti-inflammatory properties. You control the salt and flavor, making this a healthier, tastier alternative to processed pickles.
Easy Water Bath Canned Pickles
This beginner-friendly pickle recipe uses just a handful of ingredients—fresh cucumbers, vinegar, and salt—along with optional garlic, dill, and peppercorns for flavor. It’s a simple introduction to water bath canning that can be done with produce from your own garden or a local farmer’s market.
Ingredients:
-
6–8 small cucumbers (pickling variety)
-
2 cups white vinegar
-
2 cups water
-
¼ cup pickling salt
-
4 cloves garlic (optional)
-
1 tablespoon dill seed (or 2–3 fresh dill sprigs)
-
½ teaspoon peppercorns
Key Canning Safety Tips:
-
Wash and slice cucumbers as desired (spears or chips).
-
Pack into sterilized pint jars with garlic, dill, and peppercorns.
-
In a saucepan, combine vinegar, water, and salt. Bring to a boil.
-
Pour hot brine over cucumbers, leaving ½ inch headspace.
-
Wipe jar rims, apply lids, and process in a boiling water bath for 10 minutes.
-
Let jars cool; store in a cool, dark place for at least 1–2 weeks before eating.
Why it's great: Uses garden cucumbers and simple ingredients; perfect for beginners learning canning.

Pantry Bean & Rice Stew
15 minutes
1½ to 2 hours (for dried beans)
4–6
Soups & Stews / Pantry Meals
Why it’s good for health:
Beans and rice together form a complete protein , providing all the essential amino acids your body needs—important especially if you’re relying on your own food stores. Beans add fiber, iron, and B vitamins, while rice provides sustained energy. This meal is filling, budget-friendly, and heart-healthy, supporting balanced blood sugar and long-term wellness.
Pantry Bean & Rice Stew
This hearty stew is built around pantry staples like dried beans and rice, making it an affordable, nutrient-dense meal. With simple seasoning and easy prep, it’s a go-to comfort dish for preppers and homesteaders alike.
Ingredients:
-
1 cup dried beans (pinto, black, or navy)
-
1 cup rice
-
1 onion, diced
-
2 cloves garlic, minced
-
4 cups broth (or water + bouillon)
-
1 teaspoon salt
-
½ teaspoon black pepper
-
Optional: 1 teaspoon chili powder or smoked paprika
Key Canning Safety Tips:
-
Soak beans overnight (or use quick soak method).
-
In a pot, sauté onion and garlic until translucent.
-
Add beans, broth, salt, pepper, and spices. Simmer until beans are tender (1–1.5 hours).
-
Add rice; cook 15–20 minutes until tender.
-
Taste and adjust seasoning before serving.
Why it's great: Affordable, shelf-stable ingredients; hearty meal for preppers and homesteaders alike; adaptable to what’s on hand.

Canned Strawberry Jam
25 minutes
15 minutes (plus 10 minutes canning)
~7–8 half-pint jars
Food Preservation / Jams & Jellies
Why it’s good for health:
Homemade jam gives you full control over your ingredients—no high-fructose corn syrup, artificial colors, or preservatives. Strawberries are rich in vitamin C, antioxidants, and fiber , supporting immune health and heart health. Plus, while this is a sweet treat, you can use your own homegrown or locally sourced fruit, cutting down on processed food consumption and connecting with the harvest cycle.
Strawberry Jam:
Homemade jam gives you full control over your ingredients—no high-fructose corn syrup, artificial colors, or preservatives. Strawberries are rich in vitamin C, antioxidants, and fiber, supporting immune health and heart health.
Ingredients:
-
5½ cups ripe strawberries (cleaned and crushed)
-
1 pouch powdered pectin
-
8 cups sugar
Key Canning Safety Tips:
-
Wash and hull the strawberries; crush them with a potato masher or fork to measure about 5½ cups.
-
In a large pot, combine the crushed strawberries and powdered pectin.
-
Bring the mixture to a full rolling boil, stirring constantly.
-
Add all of the sugar at once; continue stirring and return to a hard boil.
-
Boil hard for 1 minute, then remove from heat. Skim off any foam.
-
Ladle the hot jam into sterilized half-pint jars, leaving ¼ inch of headspace.
-
Wipe jar rims with a clean cloth, apply lids and bands, and tighten until fingertip-tight.
-
Process jars in a boiling water canner for 10 minutes (adjust time for your altitude—check USDA tables for guidance).
-
After processing, let jars cool undisturbed. Sealed lids will snap down; any jars that don’t seal should be refrigerated and eaten first.
4. Sourcing and Seeds
Not everyone has acres of garden, but you can still grow a lot in a small space or rely on neighbors. SeedArmory’sheirloom seed vaults and kits offer curated mixes of vegetable and herb seeds to start container gardens or community plots. Heirloom seeds are open-pollinated varieties you can save each season; “they produce seeds naturally that you can save and grow again for the next generation”, reinforcing true self-sustainability.
Even a sunny windowsill can yield basil, peppers, or salad greens. For bulk produce, check local farmers markets (nutritious and often organic) or join a CSA. CSAs typically provide fresh, seasonal boxes of produce and connect you to growers; for urban preppers, this is a way to eat locally and support food resilience.
In a pinch, many communities have gleaning programs (volunteers harvest extra crop from farms or gardens) or bartering networks. Any way you source it, the goal is the same: get fresh vegetables, fruits, and herbs to preserve. Over the year, those stockpiled jars and bags will taste even better knowing they were home-grown or locally sourced.
PRODUCT SPOTLIGHT
14 Total Varieties - $11,200 Total Est Crop Value
Average Bundled Packet Price - $4.09/packet
Total Packet Price (Purchased Individually) - $57.22
- 100% Non-GMO
- 100% Heirloom
- 100% Open-Pollinated
Suitable for USDA Zones 4-9 - What's my zone?
The Seed Armory Basics Vault contains your standard garden varieties. Suitable for growing in a small garden plot to supplement your existing produce consumption.
Video : Canning 101: A Beginner's Guide (Back to Basics)
Learn More & Resources
Safe food preservation is rooted in research-backed methods. The National Center for Home Food Preservation (NCHFP) provides authoritative guides on canning, dehydrating, and fermenting (their online resources inspired much of the advice above nchfp.uga.edu nchfp.uga.edu). The USDA and Extension Services publish up-to-date guidelines (e.g. the USDA’s Complete Guide to Home Canning, and EatRight.org’s canning tips eatright.org).
For inspiration and instruction, many blogs and podcasts share hands-on tips: The Homesteading Family’s Pantry Chat podcast covers simple preserving projects, encouraging both city and country listeners to grow self-sufficient homesteadliving.com. The Homestead Journey podcast is dedicated to “self-sufficiency, self-reliance, and sustainability” and often touches on food prep. Gardening blogs like Mother Earth News, Food in Jars, or PickYourOwn.org have step-by-step tutorials on canning and fermenting.
Extension publications (your state’s land-grant university website) are also great – for example, Penn State Extension’s Drying guide notes that dried foods are “tasty, nutritious, lightweight, and easy to store” extension.psu.edu, while Oregon State Extension and others have fermenting primers.
By combining these resources with practice, you’ll master each technique. Start small – one recipe of jam, a jar of strawberry jam, a batch of fermented pickles – and build confidence. The food preparedness mindset is to begin now: every jar on your shelf is a step toward self-reliance.
And remember to enjoy the process: there’s real satisfaction in feeding your family (or yourself) with something you made and stored during times of plenty. With planning and quality tools (from SeedArmory’s heirloom seeds and kits to proper canning and dehydrating gear), you’ll turn today’s harvest into tomorrow’s security.
Frequently Asked Questions
What’s the safest way to start canning if I’ve never done it before?
Start with high-acid foods like jams, jellies, or pickles using the water-bath canning method. Always follow tested recipes (like those from the USDA or the National Center for Home Food Preservation) and never alter acid levels. Once you're comfortable, you can learn pressure canning for low-acid foods like vegetables and meats.
Can I preserve store-bought or farmers’ market produce, or do I need to grow my own?
Absolutely! You don’t need a farm. Many people stock their pantry by canning or dehydrating farmers’ market finds, CSA boxes, or even supermarket produce when it's in season and on sale. Growing your own (with heirloom seeds) adds another layer of food security, but preserving fresh, local produce is a smart first step.
How long do home-canned foods last?
Most home-canned foods are best eaten within 1–2 years for peak flavor and nutrition. However, as long as the seal is intact and there’s no spoilage (rusty lids, off smells, mold), they can stay safe longer. Always check jars carefully before eating.
What’s the biggest safety mistake to avoid in home canning?
Never skip the processing step (boiling water bath or pressure canner). Simply screwing on a lid is not enough to prevent botulism. Also, don't "wing it" with recipes—use tested guidelines to ensure correct acidity and processing times.
How do I know if my dehydrated food is dry enough?
Fruits should be leathery or crisp when cooled, and veggies should snap or crumble. Let the food cool before testing—warm food can feel deceptively pliable. You can also "condition" your dried food by packing it loosely for a few days and watching for moisture buildup.
How do I store my dried foods?
Use airtight containers (jars, vacuum-sealed bags, or Mylar with oxygen absorbers) and keep them in a cool, dark, and dry place. Properly stored, dried fruits and veggies can last 6–12 months or longer.
What’s the white film on top of my ferment—mold?
Often, it's harmless kahm yeast, which appears as a thin white film. Mold, however, is fuzzy and can be black, green, or pink. If you see mold, it’s safest to discard the batch. To prevent this, keep your ferment submerged under brine and use clean tools.
What are the benefits of using heirloom seeds for food preparedness?
Heirloom seeds are open-pollinated and non-GMO, meaning you can save seeds from your harvest and replant them season after season. This creates a self-sustaining food system—ideal for long-term prepping and self-reliance. Seed Armory has a plethora of Heirloom Seeds to get your canning journey started off right, from garden to jar.
Can I preserve herbs too?
Definitely! Herbs are perfect for dehydrating. Simply wash, dry, and bundle them to hang, or lay them on trays. Once crisp, store them in airtight jars away from light to keep their flavor strong. Check out Seed Armory's Medicinal Herb Seed Vault for more information!
Where can I get canning supplies and heirloom seeds to get started?
Seed Armory offers a great selection of food preservation equipment and heirloom seed kits to help you build your food security plan from the ground up.
Try Seed Armory Today
Learn canning, dehydrating, and fermenting with this beginner’s guide to food preparedness. Seed Armory empowers preppers and homesteaders with heirloom seeds, seed vaults, and food preservation gear for true self-sustainability and food security.