Embarking on the journey of canning your own beets opens up a world of culinary satisfaction and a delightful means to preserve the distinct essence of this nutrient-packed root vegetable for every season. Beyond the immediate joy of indulging in the freshly canned beets, the process itself becomes a fulfilling and empowering experience. As you delve into the art of canning, you'll find that the vibrant colors and robust flavors of beets can be captured and enjoyed at any time, breaking free from the constraints of seasonal availability.
For those venturing into the realm of canning for the first time, there's no need for trepidation. This beginner's guide serves as your trusty companion, guiding you through each step with clarity and simplicity. From selecting the finest beets to mastering the art of sterilizing jars, processing, and sealing, this comprehensive guide ensures that even the most novice canner can successfully navigate the journey. The reward is not just the tangible jars of preserved beets lining your pantry shelves but the knowledge and confidence gained in mastering a skill that connects you to age-old culinary traditions.
Getting Started: Beginner's Guide to Canning Beets
Gather Your Supplies
Before you dive into canning, make sure you have all the necessary equipment on hand. You'll need:
- Fresh beets
- Canning jars with lids and bands
- Water bath canner
- Jar lifter
- Canning salt
- White vinegar
- Peeler or knife
- Cutting board
- Large pot
- Ladle
- Clean kitchen towels
To embark on a successful canning journey, the first step is to select the right beets. Check our very own Seed Armory Canning Essentials that will get your food preservation started off right! Opt for beets that are not only firm but also free of blemishes, and it's ideal if they are small to medium in size. The key to a flavorful and vibrant end product lies in the freshness of the beets, so prioritize those that have been recently harvested.
Step-by-Step Beginner's Guide to Canning Beets
1. Prepare the Beets
Before diving into the canning process, thorough preparation of the beets is crucial. Begin by washing them meticulously to remove any lingering dirt. Trim off the tops, ensuring about an inch of the stem is left intact; this precaution helps prevent bleeding during the subsequent cooking process. With the beets cleaned, peel them using a vegetable peeler or a knife, and then slice them into uniform pieces.
2. Cooking the Beets
Once the beets are prepped, move on to cooking them. Place the sliced beets in a sizable pot, covering them with water. Bring the water to a boil and let the beets simmer until they reach the desired tenderness, typically within 20-30 minutes. To check for doneness, insert a fork into a beet piece – it should glide in easily.

3. Sterilize the Jars
While the beets are simmering away, it's time to prepare the canning jars. Sterilize them by immersing them in boiling water for 10 minutes. Don't forget to ensure the lids and bands are also clean and ready for use.
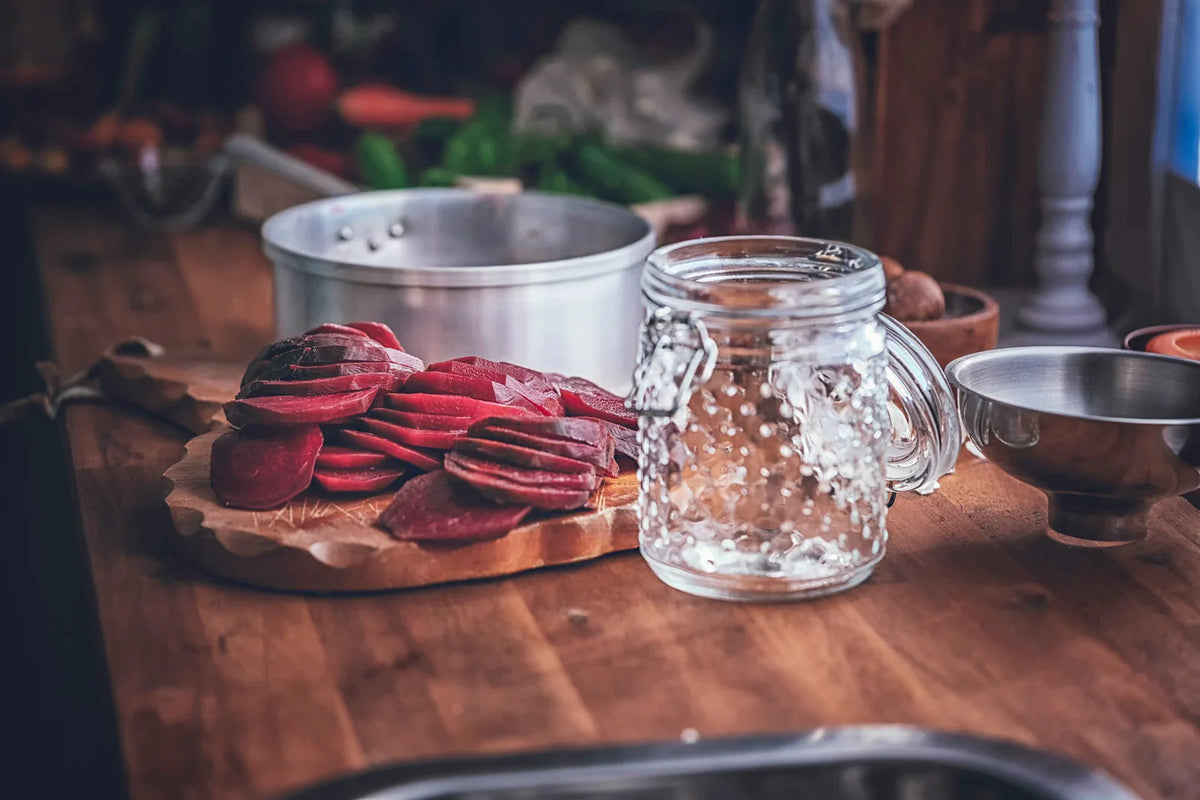
4. Pack the Jars
Once the beets are tender, drain the water, and pack the hot beets into the sterilized jars, leaving approximately an inch of headspace. Elevate the flavor by adding a pinch of canning salt to each jar. We also provide the famous and robust Ball Mason Jars to make your canning experience a breeze. Check our many sizes for all types of canning.
5. Add the Brine
Prepare a brine solution by combining water and white vinegar in a 2:1 ratio. Bring the mixture to a boil and pour it over the beets, maintaining the recommended headspace.
6. Remove Air Bubbles and Seal
Ensure the preservation process is foolproof by using a plastic or wooden utensil to eliminate any air bubbles from the jars. Wipe the jar rims with a clean, damp cloth for a proper seal. Place the sterilized lids on the jars and secure them with the bands.
7. Process in a Water Bath Canner
Carefully position the filled jars into a water bath canner, ensuring they are covered with at least an inch of water. Bring the water to a boil and process the jars for about 30 minutes.
Final Tips for Success
8. Maintain a Clean Workspace
Before diving into the canning process, ensure your workspace is clean and organized. A clutter-free area not only makes the process smoother but also minimizes the risk of contamination. Wipe down surfaces, utensils, and jars with a sanitizing solution to create a sterile environment for your canning endeavors.
9. Patience is Key
While the excitement of homemade canned goods may tempt you to rush the process, patience is crucial. Allow the jars to cool completely before moving them or testing seals. Rushing this step may compromise the integrity of the seals and affect the shelf life of your preserved items.
10. Storage Matters
Choose a cool, dark, and dry storage area for your canned goods. Excessive exposure to light and heat can degrade the quality of your preserves. A pantry or cellar is an ideal location, ensuring your efforts in canning result in jars of flavorful delights that stand the test of time.
11. Regular Inspection
Periodically inspect your canned goods for signs of spoilage, leakage, or compromised seals. This precautionary measure ensures you catch any issues early on and can prevent the spread of spoilage to other jars. If you notice any abnormalities, it's better to be safe and discard the affected jar.
12. Record Your Successes
Keep a canning journal to document your recipes, techniques, and outcomes. This serves as a valuable reference for future canning projects, helping you refine your skills and replicate successful batches. Note any variations or adjustments you make to recipes, creating a personalized guide that evolves with your growing expertise in the art of canning.
Final Thoughts
In conclusion, delving into the art of canning beets not only promises a year-round supply of this nutritious root vegetable but also offers a journey filled with culinary joy and self-sufficiency. The beginner's guide provided ensures that the process is approachable and achievable for newcomers to canning, transforming them into confident preservers of flavors. As you embark on this rewarding adventure, you're not just preserving beets; you're crafting a connection to tradition, a testament to your dedication to wholesome eating, and a source of pride in your culinary prowess. So, let the vibrant colors and robust flavors of your homemade beets grace your pantry shelves, providing a taste of the seasons and a sense of accomplishment whenever you choose to savor them. Happy canning!